- Products
- New Products
- Featured Products
- Color and Print Themes
- Blood Pressure Measurement
- NIBP / Vital Sign Monitors
- Digital Aneroid Sphygmomanometers
- Palm Aneroid Sphygmomanometers
- Pocket Aneroid Sphygmomanometers
- Pro's Combo Sphygmomanometers
- Multicuff Sphygmomanometers
- Clock Aneroid Sphygmomanometers
- Mercury Sphygmomanometers
- Home Blood Pressure Measurement
- Adcuff +
- Gauges
- Bulb & Valves
- Disposable Cuffs
- Reusable Cuffs & Bladders
- Sphygmomanometer Accessories
- Sphygmomanometer Parts
- Caseware
- CPR / Airway
- EENT
- Instruments & Accessories
- Laryngoscopes
- Penlights
- Pulse Oximeters
- Stethoscopes
- Thermometry
- Vital Signs Monitors
- Solutions
- About ADC
- Learning Center
- Support
- Blog
- Contact

Pairing the ADview with Windows 7
1. Navigate to your 'Control Panel' by clicking the 'Start button --> Control Panel'.
2. Double left click on the 'Devices and Printers' icon:

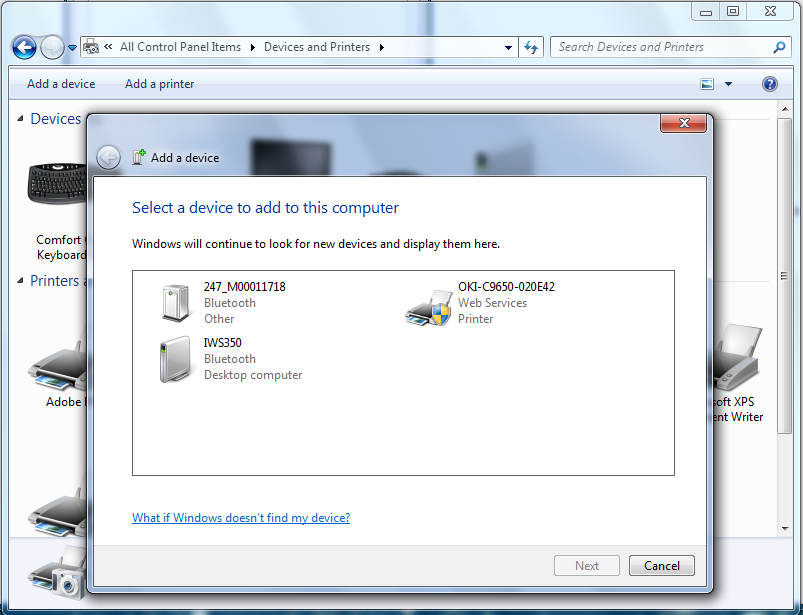
3. Make sure your ADview unit is powered on and click the 'Add a device' button in the top left corner of this screen, this will bring up the ‘Add a device screen’. Next select the ADview from this screen; it will always start 247_Mxxxxxxxx.:
4. This will display the 'Add Device Wizard'. Click ‘Enter the device’s pairing code’.
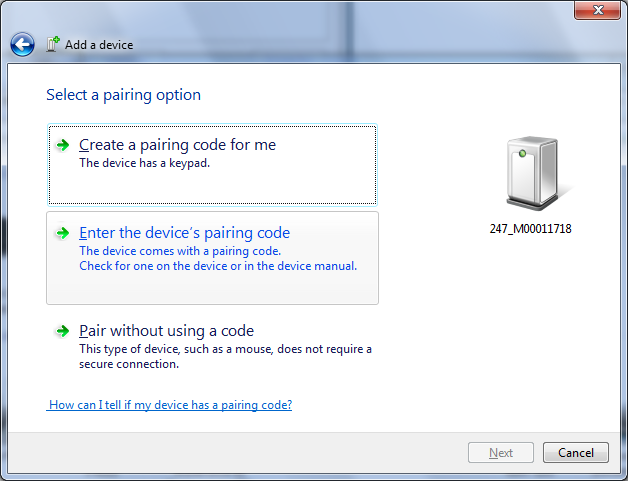
5. You will now need to enter the device’s pairing code. Enter the code 'default' into the text box and click ‘Next’. Windows will now connect to the device and install it for use with the ADviewer software.

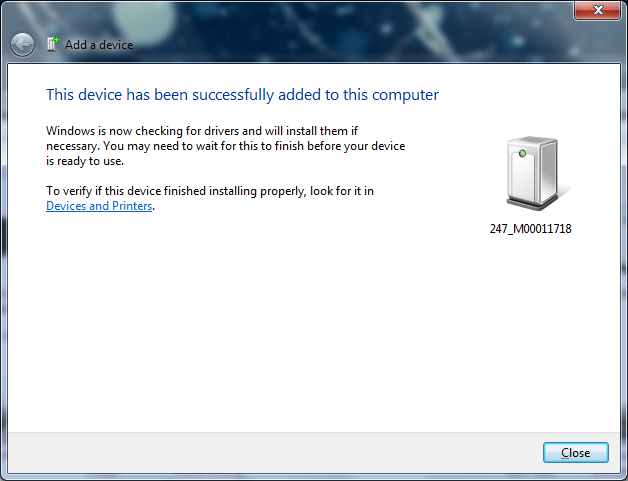
6. Once the device is successfully added to the computer you can now click “Close’ and this will bring you back to the ‘Devices and Printers’ screen.
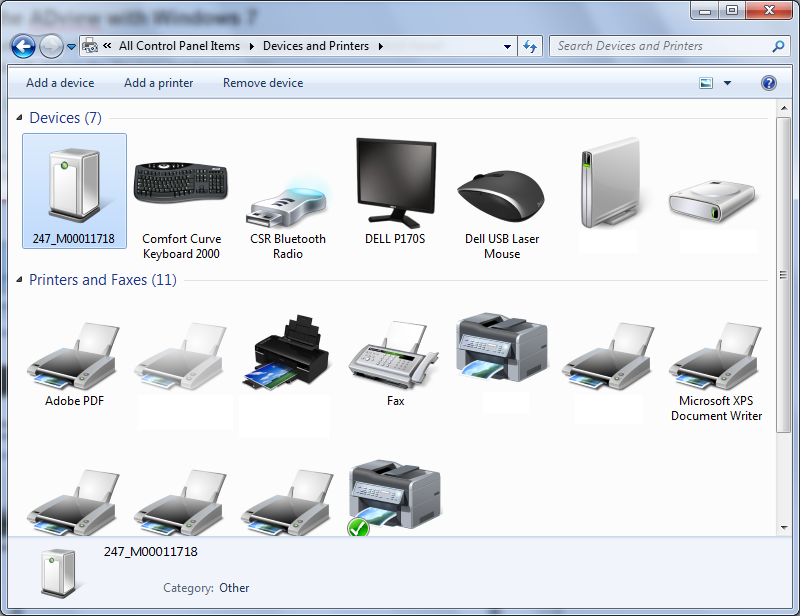
7. Now you will need to right click the device and click ‘Properties’.
8. In the Properties windows click the third tab labeled ‘Services’. You need to take note of the COM port on this screen. You will use this port later when performing the initial setup of the ADviewer software. In the example below this is COM5.

9. You can now click 'Finish'. Your ADview is now paired to your Windows 7 computer and you can begin using our ADviewer software.